


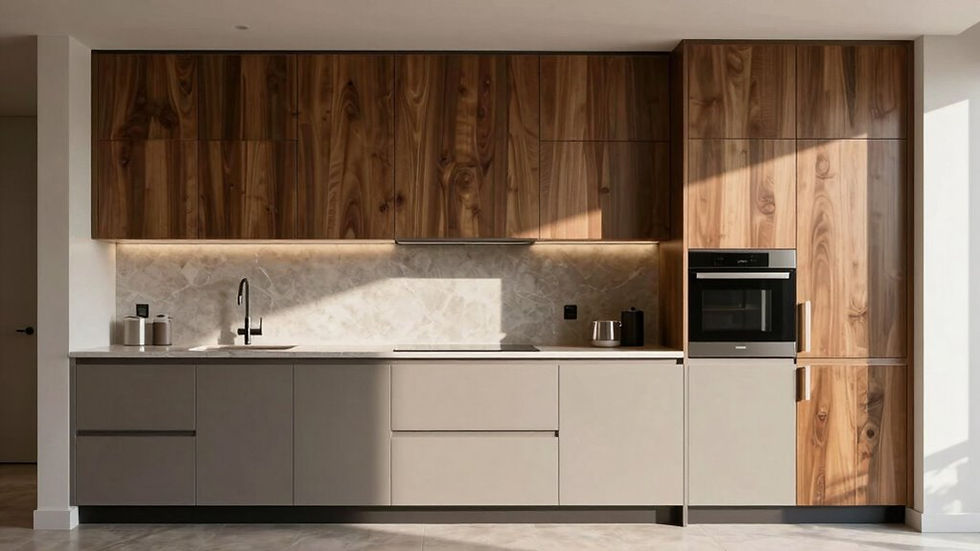
Guide to Professional Custom Bathroom Cabinet Installation
- info9141069
- 10 hours ago
- 6 min read
This guide shows you how to install custom bathroom cabinets like a pro, from precise measurements to secure mounting and final detailing. Start with pre‑installation planning, measuring height, width, and depth, then prepare the wall, check for utilities, and set a solid cleat system. Position cabinets with laser levels, shim where needed, and anchor into studs for safety. Finish with countertop integration and a thorough inspection. If you keep going, you’ll uncover even more practical steps.

Pre-Installation Planning and Measurement
Before you start installing a bathroom cabinet, take a careful look at your space and plan how everything will fit together. You’ll use measurement tools to gather precise dimensions, then translate them into a clean layout.
Record height, width, and depth in inches or centimeters, checking baseboard, middle, and top widths to detect irregularities. A level keeps wall alignment plumb, while a tape measure and pencil or grid paper help you document setup clearly.
Consider space optimization by leaving 21 inches of walking space in front of the vanity and noting obstructions like pipes or outlets. Use a stud finder to mark attachment points, and consider a laser measure for tricky spots.
Sketch the layout and transfer measurements to the cabinet back, ensuring transfer accuracy. It's important to choose high-quality materials and tools for the installation to ensure durability and aesthetic appeal.
Wall Preparation and Structural Assessment
Wall preparation and structural assessment are essential steps that guarantee a bathroom cabinet mounting is secure and long-lasting.
Before you mount, clear debris and clutter, keep the surface clean and dry, and shield the floor with a drop cloth.
Use a stud finder to locate supports, then mark positions and verify spacing around 16 inches on center.
Install a horizontal wall cleat or blocking as needed, ensuring fasteners bite into multiple studs for stability.
Scan behind the wall for pipes, wires, or utilities, and assess wall flatness to prevent gaps.
Perform a moisture assessment and address any damp areas.
Consider rail systems for heavier units, and plan caulking to seal edges after mounting.
This groundwork minimizes movement and protects your investment.
For more information on cabinet materials suitable for bathroom environments, consider exploring high-quality options that ensure durability and aesthetic appeal.
Cabinet Positioning and Leveling Techniques
You'll start by marking cabinet placements with pencil guides, making certain upper cabinets align from the top down and base cabinets sit on a level line across the wall.
Use a laser level or long spirit level to confirm horizontal and vertical alignments, checking each mark against the wall and adjusting for plumb as needed.
Keep shim and clearance checks in mind as you verify gaps and maintain consistent spacing before proceeding to installation.
For a successful installation, it is crucial to measure height from floor to ceiling to ensure precise cabinet placement and avoid alignment errors.
Cabinet Placement Marking
Marking cabinet placement starts with establishing a solid reference framework so you can align every component accurately. You’ll use layout marks on walls to pinpoint water pipes and electrical openings, then establish a horizontal baseline with a laser level or long spirit level for base cabinet positioning.
Transfer measurements from wall markings to the back of the sink cabinet, counterbalancing by reversing markings to match the cabinet’s orientation. Keep a centralized installation log with windows, doors, vents, outlets, and plumbing notes for consistent reference.
Utilizing wall-mounted cabinets can maximize vertical space, freeing up valuable floor area and creating a clean, uncluttered look for a more open feel.
Identify the highest floor point first, then plan shimming for irregularities and bowed walls. Document stud locations and plan anchors into at least one stud. This approach highlights cabinet orientation techniques and reinforces marking accuracy importance.
Leveling and Alignment
Even with solid reference marks in place, you’ll want to start by establishing a precise horizontal reference line across the wall for base cabinets. Use the high point, floor and reference line, then verify levelness after each placement to guarantee cabinet stability.
Align cabinets front to back and side to side, checking both horizontal and vertical plumb as you go. Employ a laser level for consistency and clamps to hold components while you adjust.
Use shims to address uneven floors or walls, then trim excess material after leveling.
Recheck each cabinet after securing to studs to confirm alignment and stability.
Verify top surfaces are level across the run before mounting countertops, refining your adjustment strategies.
When hiring a contractor for bathroom renovations, it's crucial to conduct thorough research and verify credentials to ensure quality and reliability.
Shim and Clearance Check
Begin by confirming the shim and clearance plan across the run. You identify the high floor spot, place the first cabinets there, and measure upward to mark reference lines.
Use these lines to guide your shim pairing: insert shims in front-and-back pairs—back rail and under the front stile—and dry-fit before final shimming.
Tilt the cabinet slightly at the back to start quarter-inch adjustments, then bring it to the reference line first and match the front to prevent twisting.
For clearance, verify appliance gaps after shimming and anticipate future flooring by adjusting height so dishwasher and fridge openings remain usable.
Secure shims with fasteners, pre-drill where needed, and trim protruding pieces after securing.
Prioritize shim durability while performing clearance adjustments for a stable, level installation. When designing a spa-like bathroom, consider incorporating natural textures to enhance the calming ambiance and create a cohesive design aesthetic.

Securing and Fastening Methods
You’ll secure cabinets by anchoring into studs where possible and by distributing fasteners evenly to prevent sag or twist. If studs don’t align with fixing points, you’ll switch to robust wall anchors and plan a careful fastener pattern that maintains load capacity. Throughout, you’ll coordinate screw length, placement, and order to keep everything level and secure before hinges and doors are installed. For a polished appearance, consider incorporating decorative moldings to enhance the sophistication of your traditional bathroom cabinets.
Securement With Studs
Securement with studs is about choosing the right fasteners and aligning them accurately so your bathroom cabinet stays solid over time. You’ll rely on precise stud location, pre-drilled center-of-stud holes, and correct screw types to maximize support. Use stud types and mounting techniques that match cabinet weight and wall construction for lasting integrity.
Align mounting brackets with marked stud edges, then drive screws through the cabinet into the stud centers.
Pre-drill pilot holes, using appropriate bits, to prevent splitting and guarantee snug, secure fasteners.
Verify level after mounting, then test stability with a light load to confirm even distribution.
Remember: traditional screws or heavy-gauge anchors work best in studs, while toggle bolts are for non-stud areas.
Fastener Distribution Strategy
Fastener distribution is about placing the right number of anchors and screws where they’ll do the most work. You optimize this by coordinating fastener types with load distribution across the cabinet.
Start with spacing guidelines: screws every 12 to 16 inches along mounting points, and drill holes 1 inch deep for snug anchors. Align screw positions with cabinet frame holes precisely, and space fasteners to account for wall obstacles beyond studs.
Use appropriate anchor types for drywall, such as toggles or heavy-duty anchors, and insert them into pilot holes exactly. Maintain minimum quantities: two fasteners at the top for light loads, with extra screws for multi-stud spans and occasional stud contact.
Verify level, test stability, and adjust hinges for smooth operation, ensuring anchors sit flush and tight.
Countertop and Sink Integration
Countertop and sink integration blends form and function, creating a seamless workspace that’s both durable and easy to clean.
You’ll choose materials that align with your countertop styles and guarantee a cohesive look. Integrated sinks molded from the same quartz slab offer a seamless appearance, while undermount basins influence edge profiles and support a clean line.
Pairing options vary, from bold granite contrasts to soft marble in traditional settings, so your selection should reflect both style and practicality.
Consider sink materials that match or complement your countertop
Plan edge profiles and sealing for long-lasting waterproofing
Verify compatibility with cabinet construction and installation steps

Final Inspection and Quality Assurance
Once the cabinet installation is complete, you’ll shift focus to final inspection and quality assurance to confirm everything performs as intended.
You’ll run a thorough final quality check, confirming that doors and drawers open smoothly, align flush to the frame, and hinge adjustments are precise.
Verify levels, plumb, and secure fastening across all units, and ascertain scribing matches wall contours.
Ensure all units are level, plumb, and securely fastened, with scribing matching wall contours.
Check all fasteners, pilot holes, and hardware for tightness and proper operation, with no protrusions.
Inspect surfaces for blemishes, warping, or water damage, and confirm finishes are even and consistent.
Review component installation against design plans, and verify plumbing and electrical cut-outs are concealed.
Maintain an inspection checklist to document outstanding items and guarantee a clean handover.
Wrapping It Up
You’ve covered every step, from planning to final inspection, and you’re ready to install with confidence. By measuring accurately, securing cabinets properly, and ensuring a solid countertop integration, you minimize mistakes and maximize durability. Stay vigilant about wall conditions and levelness, and verify all connections before use. With this approach, your professional result will look polished and function smoothly, meeting high standards without unnecessary complexity. Keep documenting your process for future refinements and safe, long-lasting performance.


Comments